
Flutterで、Glassmorphism(グラスモーフィズム)を使ったContainerの実装方法について解説していきます。
他のGlassmorphismを使ったWidgetを実装する際も役に立つことを記載しているので、ぜひ最後まで読んでいただけると嬉しいです。
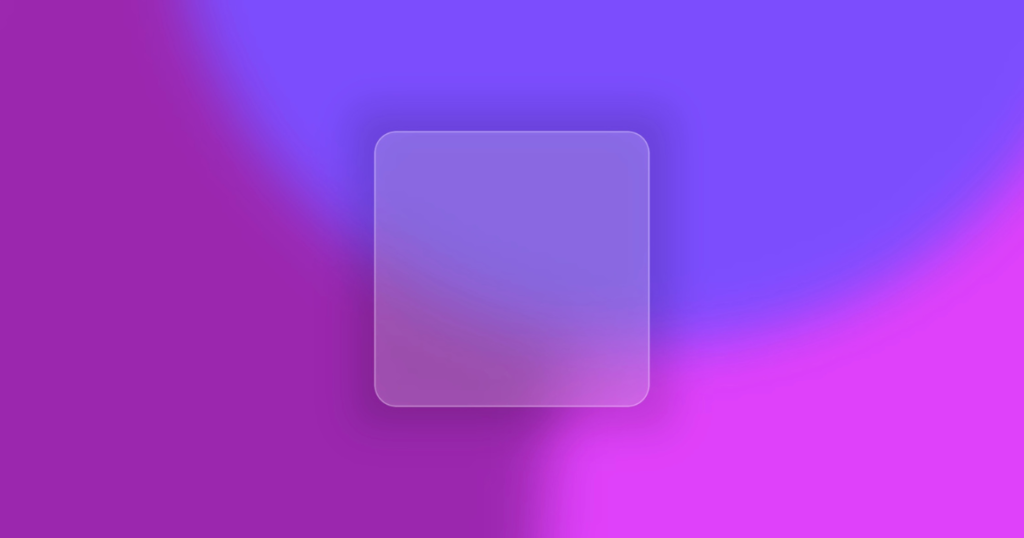
単色のGlassmorphism Container
Container に 以下のエフェクトを適用することで、Glassmorphismを表現することができます。
- 影をつける
- 背景をぼかす
- 半透明のガラスのような質感を表現する
影をつける
UIの階層表現をわかりやすくするために、BoxDecorationのboxShadowやMaterialのelevationを使用して影をつけます。
影の色や濃さ、範囲を柔軟に設定したいので、今回はboxShadowを使用します。
BoxDecoration(
  boxShadow: shadow
      ? boxShadow ??
          [
            BoxShadow(
              blurRadius: 24, // 影のぼかし具合
              spreadRadius: 16, // 影の範囲
              color: Colors.black.withOpacity(0.15), // 影の色
            ),
          ]
      : null,
),
背景をぼかす
曇りガラスのような質感を表現するために、BackdropFilterを使用して背景をぼかします。
BackdropFilterはchildではなく後ろにあるWidgetをぼかすので、childにTextなどのContainerに入れたいWidgetを渡しても背景のみをぼかすことができます。
BackdropFilter(
  filter: ImageFilter.blur(
    sigmaX: sigmaX,
    sigmaY: sigmaY,
  ),
  child: child, // このWidgetはぼやけない
),
半透明のガラスのような質感を表現する
このままでは背景がぼやけているだけになってしまうので、Containerに色をつけます。
色のOpacityを調整することで、背景を透過させることができます。
ステンドグラスのように白以外の色も設定できるようにすると、表現の幅がグッと広がります。
Container(
  width: width,
  height: height,
  decoration: BoxDecoration(
    color: color ?? Colors.white.withOpacity(0.3),
    borderRadius: BorderRadius.circular(radius),
    border: border ?? // 境界線をつけることで、背景とUIの違いがより鮮明になります。
      Border.all(
        width: 1,
        color: Colors.white.withOpacity(0.3),
      ),
  ),
  child: child,
),
ソースコード
import 'dart:ui';

import 'package:flutter/material.dart';

class ColoredGlassContainer extends StatelessWidget {
  const ColoredGlassContainer({
    Key? key,
    this.width,
    this.height,
    this.child,
    this.shadow = true,
    this.boxShadow,
    this.radius = 16,
    this.sigmaX = 16,
    this.sigmaY = 16,
    this.border,
    this.color,
  }) : super(key: key);

  final double? width;
  final double? height;
  final Widget? child;
  final bool shadow;
  final List<BoxShadow>? boxShadow;
  final double radius;
  final double sigmaX;
  final double sigmaY;
  final Border? border;
  final Color? color;

  @override
  Widget build(BuildContext context) {
    return Container(
      decoration: BoxDecoration(
        boxShadow: shadow
            ? boxShadow ??
                [
                  BoxShadow(
                    blurRadius: 24,
                    spreadRadius: 16,
                    color: Colors.black.withOpacity(0.15),
                  ),
                ]
            : null,
      ),
      child: ClipRRect(
        borderRadius: BorderRadius.circular(radius),
        child: BackdropFilter(
          filter: ImageFilter.blur(
            sigmaX: sigmaX,
            sigmaY: sigmaY,
          ),
          child: Container(
            width: width,
            height: height,
            decoration: BoxDecoration(
              color: color ?? Colors.white.withOpacity(0.3),
              borderRadius: BorderRadius.circular(radius),
              border: border ??
                  Border.all(
                    width: 1,
                    color: Colors.white.withOpacity(0.3),
                  ),
            ),
            child: child,
          ),
        ),
      ),
    );
  }
}
使用例
ColoredGlassContainer(
  color: Colors.white.withOpacity(0.2),
  width: 200,
  height: 200,
),
グラデーションを取り入れたGlassmorphism Container
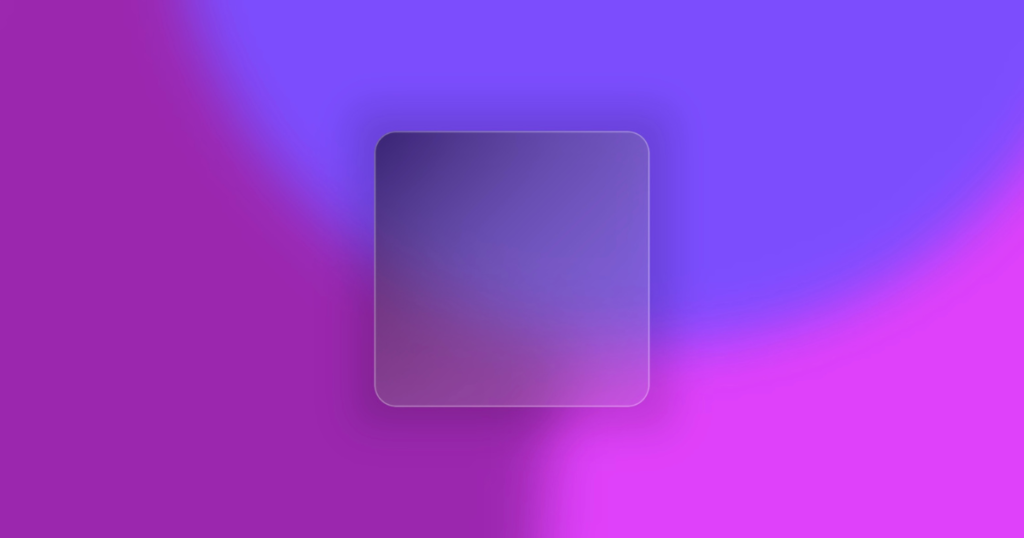
グラデーションをつける場合も、Containerにつける色を単色からグラデーションに変えることで簡単に表現することができます。
グラデーションをつける
BoxDecorationのgradientを使用することで、Containerにグラデーションをつけることができます。
BoxDecoration(
  gradient: LinearGradient(
    colors: [
      beginColor,
      endColor,
    ],
    begin: beginAlignment,
    end: endAlignment,
  ),
  borderRadius: BorderRadius.circular(radius),
  border: border ??
     Border.all(
       width: 1,
       color: Colors.white.withOpacity(0.3),
  ),
)
ソースコード
import 'dart:ui';

import 'package:flutter/material.dart';

class GradientGlassContainer extends StatelessWidget {
  const GradientGlassContainer({
    Key? key,
    this.width,
    this.height,
    this.child,
    this.shadow = true,
    this.boxShadow,
    this.radius = 16,
    this.sigmaX = 16,
    this.sigmaY = 16,
    this.border,
    required this.beginColor,
    required this.endColor,
    this.beginAlignment = Alignment.bottomRight,
    this.endAlignment = Alignment.topLeft,
  }) : super(key: key);

  final double? width;
  final double? height;
  final Widget? child;
  final bool shadow;
  final List<BoxShadow>? boxShadow;
  final double radius;
  final double sigmaX;
  final double sigmaY;
  final Border? border;
  final Color beginColor;
  final Color endColor;
  final Alignment beginAlignment;
  final Alignment endAlignment;

  @override
  Widget build(BuildContext context) {
    return Container(
      decoration: BoxDecoration(
        boxShadow: shadow
            ? boxShadow ??
                [
                  BoxShadow(
                    blurRadius: 24,
                    spreadRadius: 16,
                    color: Colors.black.withOpacity(0.15),
                  ),
                ]
            : null,
      ),
      child: ClipRRect(
        borderRadius: BorderRadius.circular(radius),
        child: BackdropFilter(
          filter: ImageFilter.blur(
            sigmaX: sigmaX,
            sigmaY: sigmaY,
          ),
          child: Container(
            width: width,
            height: height,
            decoration: BoxDecoration(
              gradient: LinearGradient(
                colors: [
                  beginColor,
                  endColor,
                ],
                begin: beginAlignment,
                end: endAlignment,
              ),
              borderRadius: BorderRadius.circular(radius),
              border: border ??
                  Border.all(
                    width: 1,
                    color: Colors.white.withOpacity(0.3),
                  ),
            ),
            child: child,
          ),
        ),
      ),
    );
  }
}
使用例
GradientGlassContainer(
  width: 200,
  height: 200,
  beginColor: Colors.white.withOpacity(0.1),
  endColor: Colors.black.withOpacity(0.5),
),
